
I finally got around to fitting all the bits together so I could try and start the engine.
To be honest with you, I didn't hold out much hope of it starting but that's just me being my normal negative self. Seeing as I'd never heard the engine running and most of the bike actually came in a box I did have good reason to feel so negative! I put some fresh fuel in the tank, made sure that all the wires were connected to where they should be and said a prayer to the mechanic gods.
My first surprise was that the engine actually turned over from the starter! So the wiring was ok, the starter motor was fine and the engine was connected to said starter, fantastic. Next surprise was that it started to cough and splutter and was really trying its hardest to start. A little more encouragement and, good god, she started! Then stopped. Got her going again and soon it became apparent that there were issues. Actually two issues; both pipes were smoking. It wasn't black smoke that you'd get if it was running rich, it was the grey stuff that hangs around for a while and lets you know from smell alone that it's burning oil. Damn.
Oh well, for those few seconds before the smoke appeared I was as happy as could be. All that stands between me feeling that way again is an engine rebuild and I'm the man to do it (I hope)! I'll cover the strip and rebuild in the next set of posts.
Thursday, 4 March 2010
Thursday, 18 February 2010
Update on Painting
Just a quick update on where we're at with painting the bike.
Items painted so far:
Frame
This has been shot blasted to remove any surface corrosion and general crud and then received a number of coats of zinc based primer to a provide a rust proof barrier for the future. It's then been coated with satin black paint and clear coated to provide knock resistance. (picture doesn't show it painted, just primed)
 Forks
Forks
Shot blasted, base coated and then sprayed with a hard wearing silver paint and finally clear coated.

Swinging Arm, rear shock and rear shock linkage
Both of these have been shot blasted, base coated and then sprayed with a hard wearing silver paint and then clear coated.

Torque bar
Shot blasted, base coated and then sprayed matt black.
Top and bottom yoke + headlight bracket
Shot blasted and then spayed with hammerite black smooth. These were painted with this paint instead of the satin black used elsewhere because of their exposure at the front of the bike. All stones and weather will hit these first.
Horn
I've covered this in a previous post
Brake calliper
Cleaned up and then painted with black gloss calliper paint. I'll post an article on the brake calliper at some point because it required a little work to get it back to working order.

Fuel tank
It took Andy around 6 hours to get all the green, purple (!) and silver (possibly the original colour?) paint off the tank. Whatever they painted this Superdream with was certainly tough stuff. It's now been primed and finished off with some very lovely bright red paint, and it looks fantastic!

Stuff left to paint / apply:
Side panels & Rear cowling
These still need to be cleaned up, but seeing as they are plastic they should clean up a bit easier than the tank (hopefully).
Get some replacement decals for the tanks and panels
Decals have been ordered, they won't be applied until the whole bike is back together just in case they get damaged in some way.
Items painted so far:
Frame
This has been shot blasted to remove any surface corrosion and general crud and then received a number of coats of zinc based primer to a provide a rust proof barrier for the future. It's then been coated with satin black paint and clear coated to provide knock resistance. (picture doesn't show it painted, just primed)

Shot blasted, base coated and then sprayed with a hard wearing silver paint and finally clear coated.

Swinging Arm, rear shock and rear shock linkage
Both of these have been shot blasted, base coated and then sprayed with a hard wearing silver paint and then clear coated.

Torque bar
Shot blasted, base coated and then sprayed matt black.
Top and bottom yoke + headlight bracket
Shot blasted and then spayed with hammerite black smooth. These were painted with this paint instead of the satin black used elsewhere because of their exposure at the front of the bike. All stones and weather will hit these first.
Horn
I've covered this in a previous post
Brake calliper
Cleaned up and then painted with black gloss calliper paint. I'll post an article on the brake calliper at some point because it required a little work to get it back to working order.

Fuel tank
It took Andy around 6 hours to get all the green, purple (!) and silver (possibly the original colour?) paint off the tank. Whatever they painted this Superdream with was certainly tough stuff. It's now been primed and finished off with some very lovely bright red paint, and it looks fantastic!

Stuff left to paint / apply:
Side panels & Rear cowling
These still need to be cleaned up, but seeing as they are plastic they should clean up a bit easier than the tank (hopefully).
Get some replacement decals for the tanks and panels
Decals have been ordered, they won't be applied until the whole bike is back together just in case they get damaged in some way.
Friday, 15 January 2010
Fork restoration - part 4 - putting them back together
So, with the fork legs painted and the stanchions repaired it was time to put them back together again.
First thing I did was to clean the fork legs out thoroughly to make sure there wasn't any sand, dirt or even paint left inside them. Last thing I wanted was to go through all this and then damage the forks by not cleaning them properly.
 Once they were clean I put some oil on the fork oil seal and took a 32mm socket and used it to 'drift' it into place. You just have to push it down far enough so that the groove in the top of the fork leg is visible. That groove is where a retaining clip fits so it's important to have it exposed the whole way around the leg.
 I then fitted the retaining clip and packed the top end of the fork with grease and put the dust seals on.
The stanchion itself needed to be rebuilt. So I refitted the damper rod along with the rebound damper spring and made sure it was sticking out the bottom of the stanchion. I put it back into the fork leg, trying my best not to unsettle the oil seals and once it was all the way in refitted the bolt at the bottom of the fork leg. Refitting the bolt was much easier than removing it!
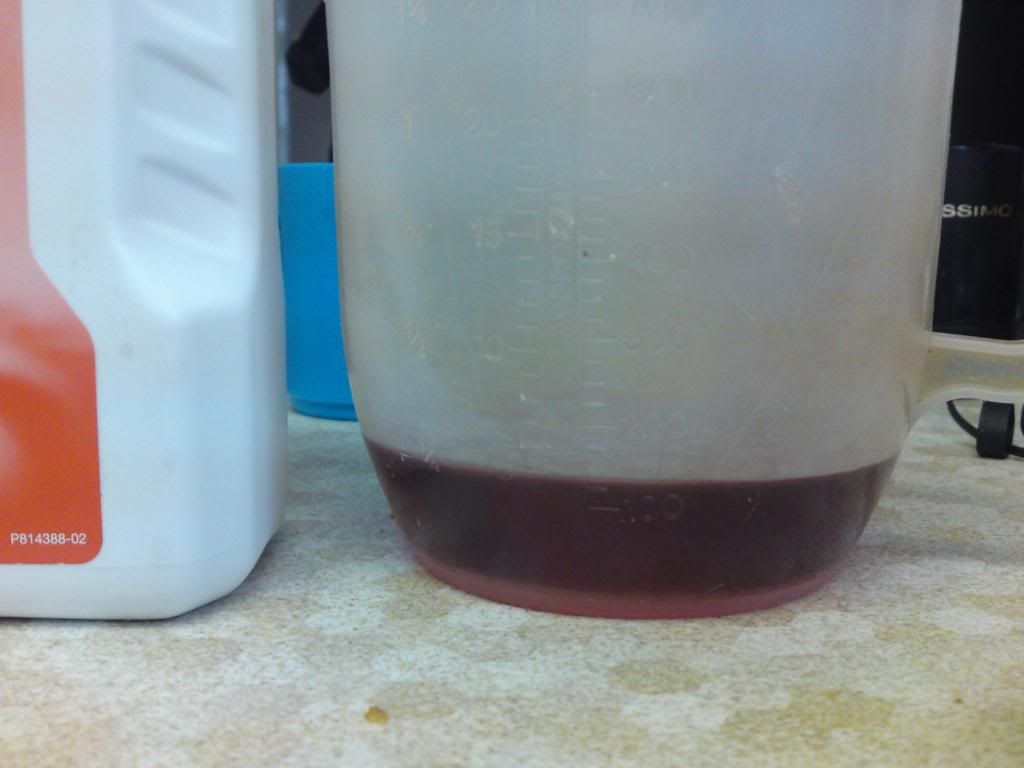
Right, the forks are now one piece again so its time to put some oil into them. Most bikes have a prescribed oil weight and quantity but due to the light weight nature of the CB125 you use automatic transmission fluid. Each fork leg takes 128mm of fluid so I borrowed the measuring jug from the kitchen (don't tell) and measured it out:

The only things left to do now was pour it in, fit the main spring and put the caps back on the top.

Easy eh!
First thing I did was to clean the fork legs out thoroughly to make sure there wasn't any sand, dirt or even paint left inside them. Last thing I wanted was to go through all this and then damage the forks by not cleaning them properly.
 Once they were clean I put some oil on the fork oil seal and took a 32mm socket and used it to 'drift' it into place. You just have to push it down far enough so that the groove in the top of the fork leg is visible. That groove is where a retaining clip fits so it's important to have it exposed the whole way around the leg.
 I then fitted the retaining clip and packed the top end of the fork with grease and put the dust seals on.
The stanchion itself needed to be rebuilt. So I refitted the damper rod along with the rebound damper spring and made sure it was sticking out the bottom of the stanchion. I put it back into the fork leg, trying my best not to unsettle the oil seals and once it was all the way in refitted the bolt at the bottom of the fork leg. Refitting the bolt was much easier than removing it!
Right, the forks are now one piece again so its time to put some oil into them. Most bikes have a prescribed oil weight and quantity but due to the light weight nature of the CB125 you use automatic transmission fluid. Each fork leg takes 128mm of fluid so I borrowed the measuring jug from the kitchen (don't tell) and measured it out:
The only things left to do now was pour it in, fit the main spring and put the caps back on the top.
Easy eh!
Fork restoration - part 3 - fixing the stanchions
With the fork legs sorted I turned my attention to the fork stanchions.
Bad news, there's a bit of pitting near the fork seal area that will damage any new seals. I checked with some local firms who deal with re-chroming but none of them wanted to help out with such a small job. A quick internet search turned up pittedforks.com but they wanted £156 to re-chrome them. Ok, they would have done a lot more than just re-chrome but £156 was too much for a bike of this age / value.
Next option was to price up some replacement stanchions. No luck there either. I couldn't find anyone selling some.
Last option, araldlite precision adhesive.

The idea with this stuff is that you mix it up and then apply it over the pits in the stanchions. When it's dry you take some medium grade wet and dry paper and sit there for friggin' hours (6hrs in my case) sanding away at the dry adhesive until it's level with the chrome. That fills the pits in the chrome and, even though the stanchion looks a bit naff with the pits still visible, they don't do any damage to the seals.
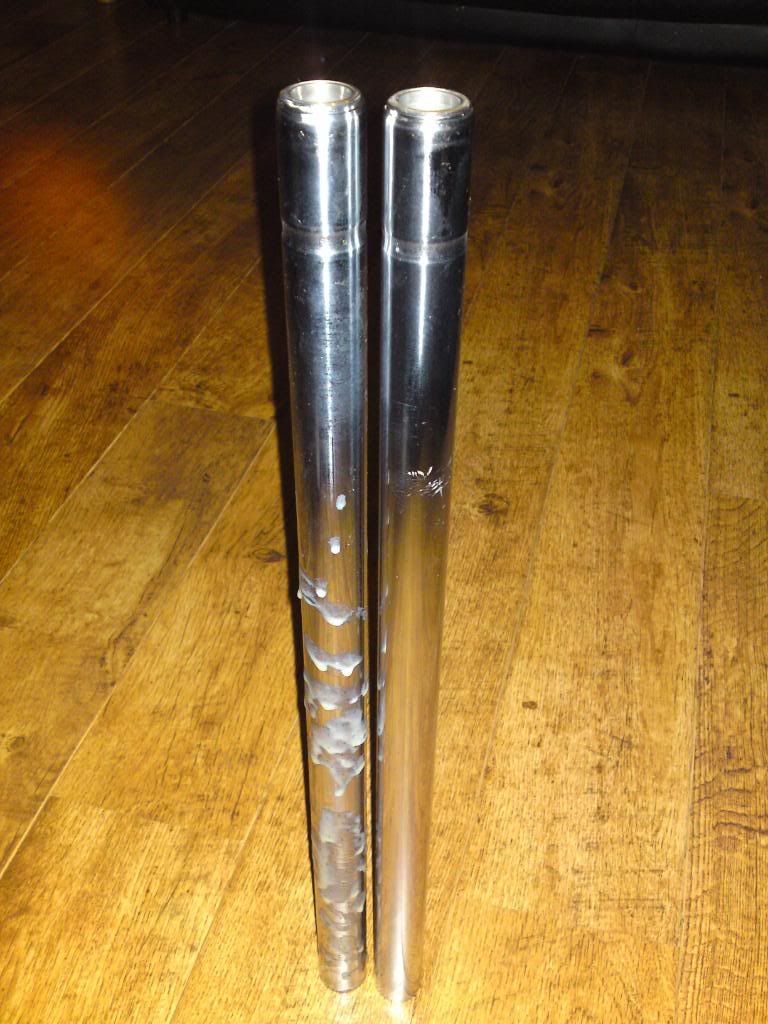
Here's the stanchions, one of them with most of the dry araldite sanded down and the other one untouched (Yes, I did put too much on and it dripped down - oh deep joy - not)

If you are planning on doing this yourself I have a tip for you. Don't. Seriously, it takes forever so if you have a life get a firm to do the work instead, or if you have the option just buy some new stanchions.
If you didn't read that last paragraph I have a further tip for you. Get the araldite precision stuff (blue packaging) and not the red stuff (which is rapid I think). Not sure why but that's what I was told!
Like I said, the pits are still visible after all this hard work so I'll fit some fork gaiters once they are back on the bike so you won't even see the hard work! At least the fork oil seals will appreciate it.

Next, putting them back together...
Bad news, there's a bit of pitting near the fork seal area that will damage any new seals. I checked with some local firms who deal with re-chroming but none of them wanted to help out with such a small job. A quick internet search turned up pittedforks.com but they wanted £156 to re-chrome them. Ok, they would have done a lot more than just re-chrome but £156 was too much for a bike of this age / value.
Next option was to price up some replacement stanchions. No luck there either. I couldn't find anyone selling some.
Last option, araldlite precision adhesive.

Here's the stanchions, one of them with most of the dry araldite sanded down and the other one untouched (Yes, I did put too much on and it dripped down - oh deep joy - not)
If you didn't read that last paragraph I have a further tip for you. Get the araldite precision stuff (blue packaging) and not the red stuff (which is rapid I think). Not sure why but that's what I was told!
Like I said, the pits are still visible after all this hard work so I'll fit some fork gaiters once they are back on the bike so you won't even see the hard work! At least the fork oil seals will appreciate it.

Next, putting them back together...
Fork restoration - part 2 - painting the legs
For the first part of the fork restoration go here: Fork restoration part-1 stripping them
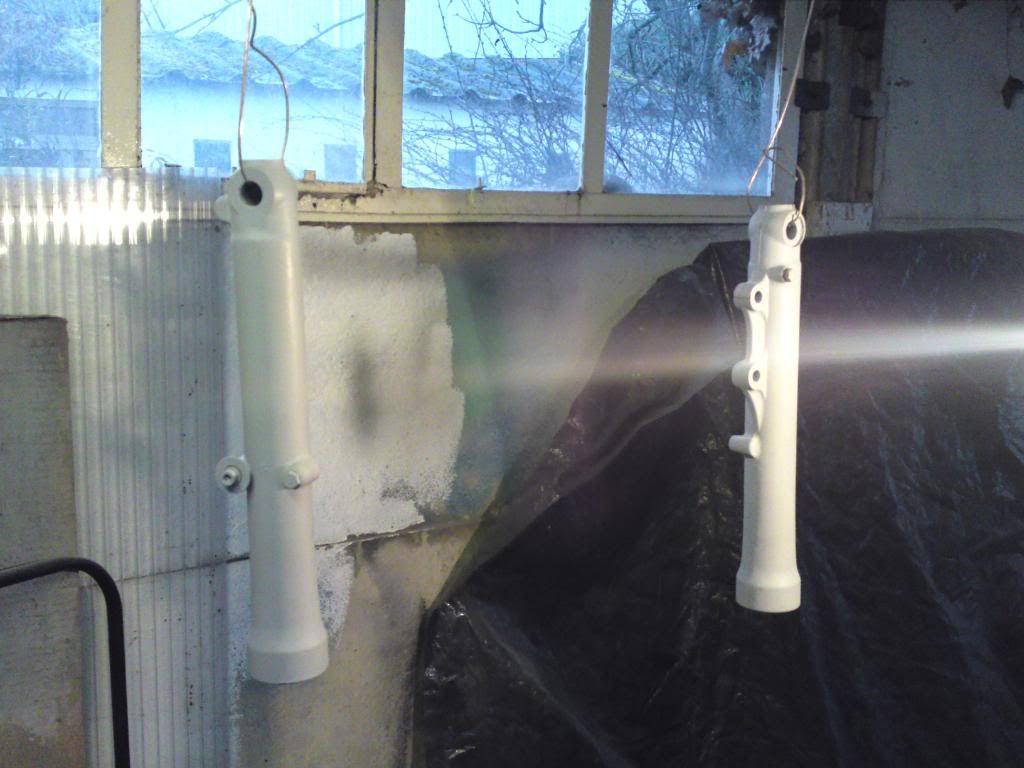
The surface of the fork legs was looking very corroded. We decided that it was best to sand blast the legs to get all crap off them and then paint them back up. Andy fired up the compressor, got some sand and blasted the legs. Sadly I don't have any pictures of them after they were blasted but I do have one showing them being painted:

(that's my parents garage aka Andy's spay booth)
and a little closer:

covered in primer drying off.
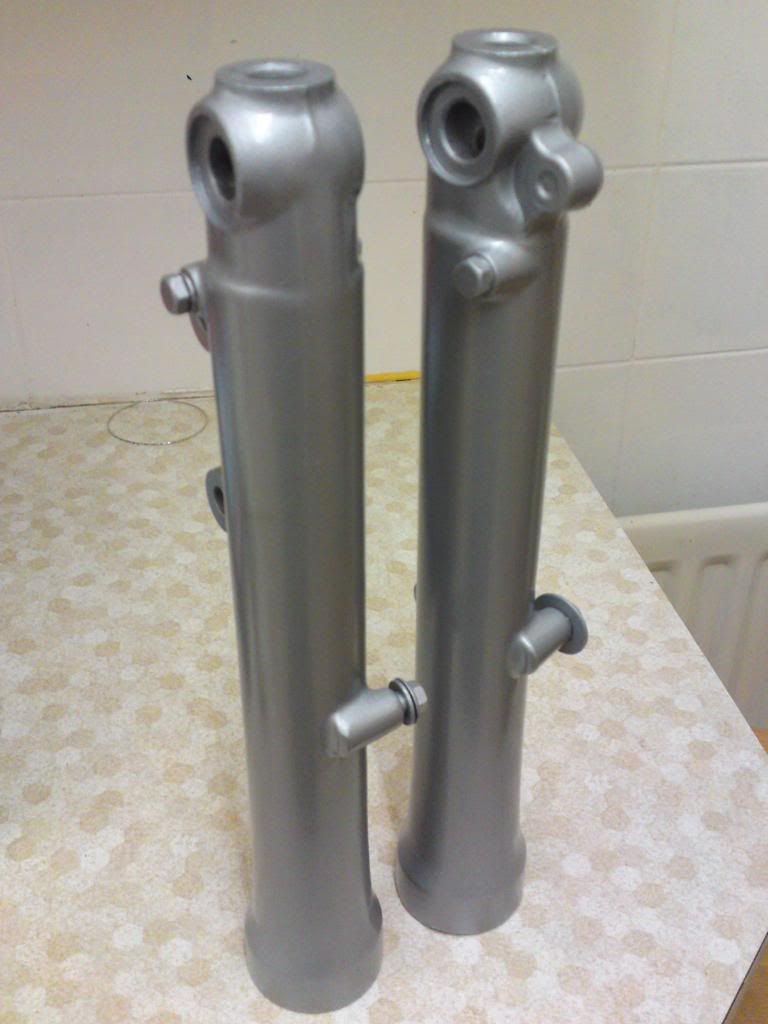
Once they were dry, we sanded them down with some fine (1200) wet and dry paper to get all the rough edges off them (thanks for your help James). They were then ready for the next stage of paint. Andy had some nice silver paint which I think is normally used on alloy wheels. It's a nice colour, works well on alloy and is pretty tough stuff so that went on in a number of coats.
Top job in the spay booth Andy!
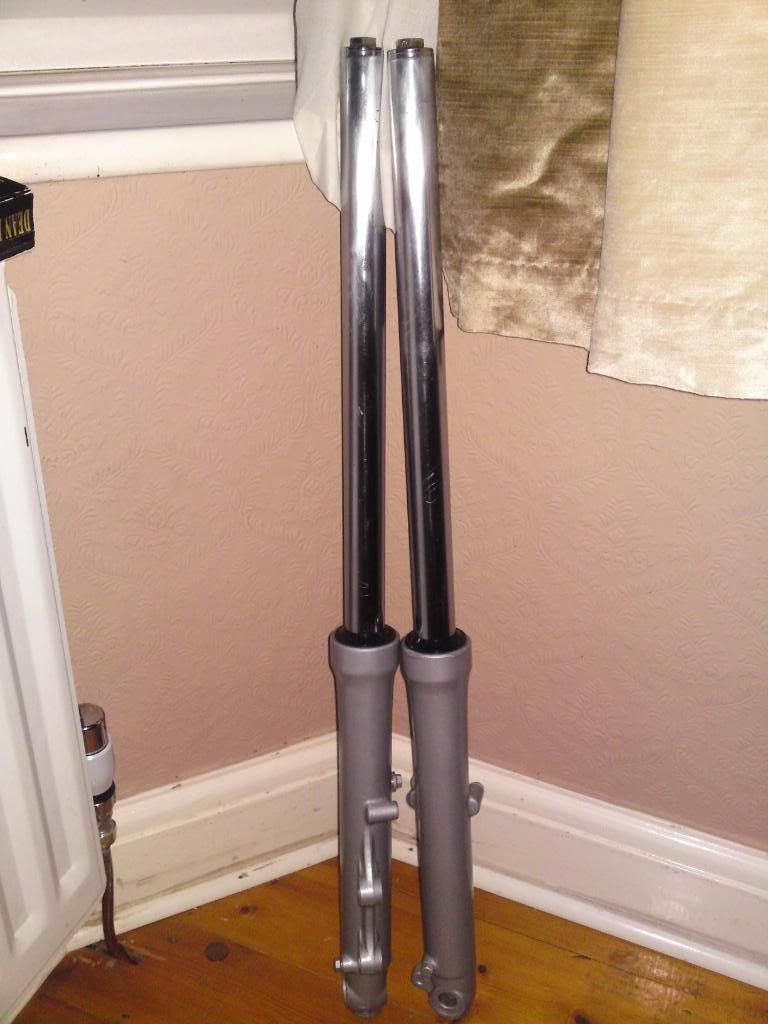
After a couple coats of clear and this is what they looked like:

I know I am biased but I think they look fantastic. Stanchions next....
The surface of the fork legs was looking very corroded. We decided that it was best to sand blast the legs to get all crap off them and then paint them back up. Andy fired up the compressor, got some sand and blasted the legs. Sadly I don't have any pictures of them after they were blasted but I do have one showing them being painted:
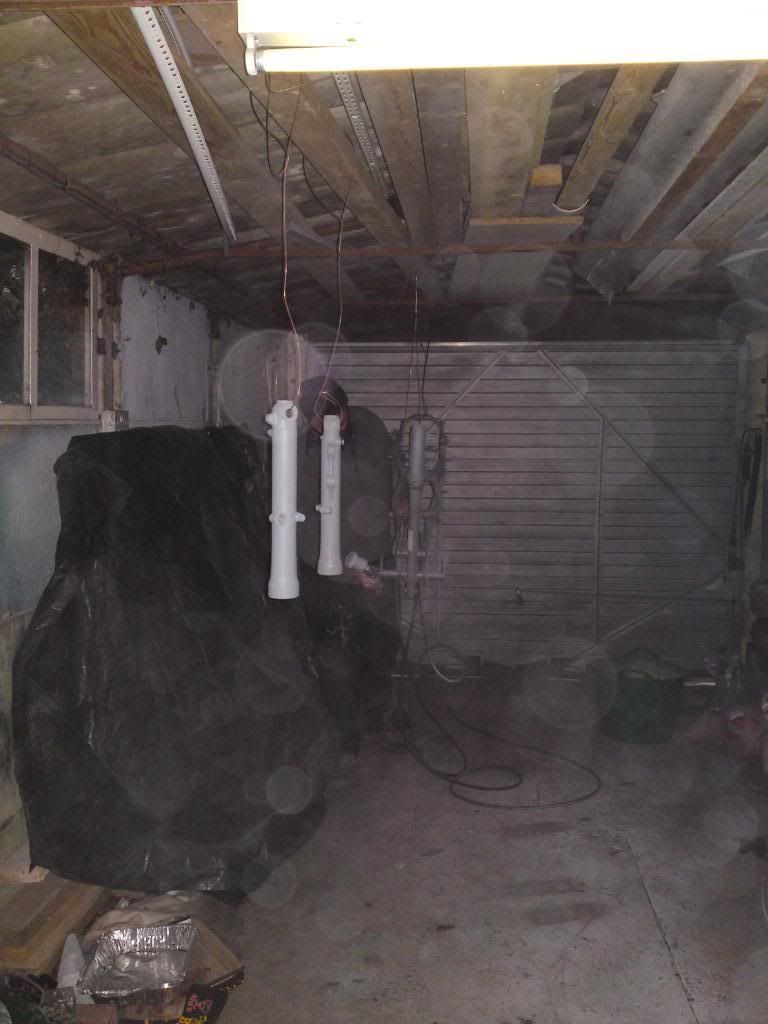
(that's my parents garage aka Andy's spay booth)
and a little closer:
covered in primer drying off.
Once they were dry, we sanded them down with some fine (1200) wet and dry paper to get all the rough edges off them (thanks for your help James). They were then ready for the next stage of paint. Andy had some nice silver paint which I think is normally used on alloy wheels. It's a nice colour, works well on alloy and is pretty tough stuff so that went on in a number of coats.
Top job in the spay booth Andy!
After a couple coats of clear and this is what they looked like:
I know I am biased but I think they look fantastic. Stanchions next....
Thursday, 14 January 2010
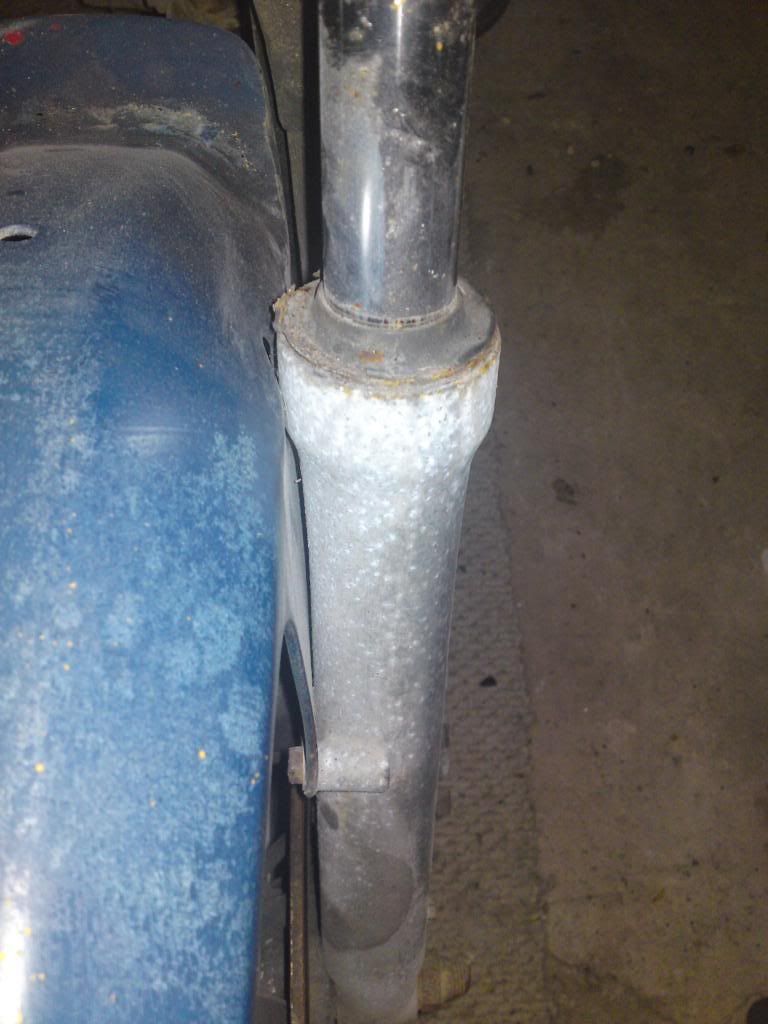
Fork restoration - part 1 - stripping them down
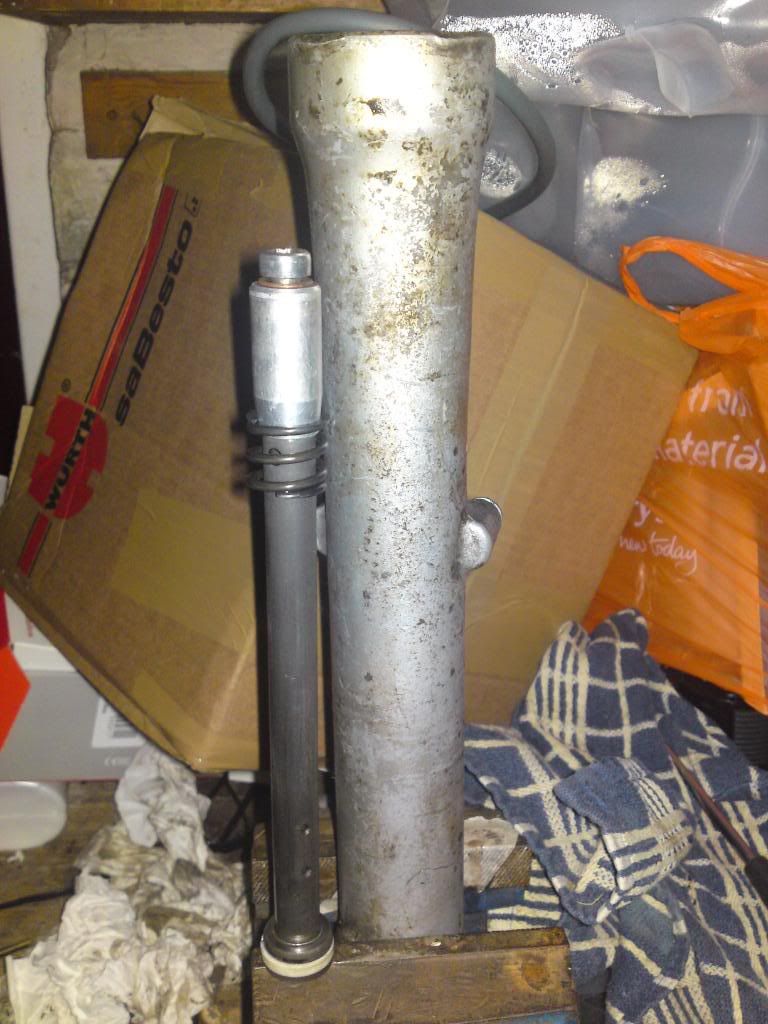
When your forks look like this you know they are going to need some TLC

The restoration of these forks will be a multi part fix that consists of repainting the fork legs, removing surface corrosion from the stanchions, filling in the pitting in the stanchions and finally changing the oil and dust seals.
First things first, stripping them down.
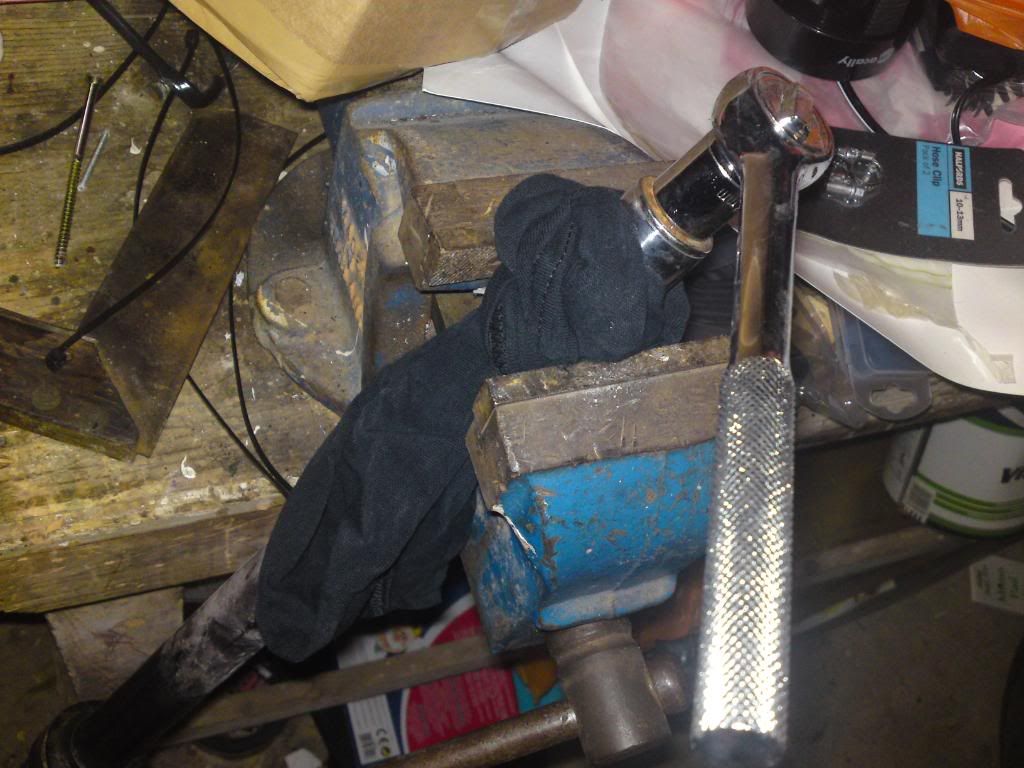
I've since learned that the first thing to do when attempting something like this is to crack the fork top nut before you remove them from the bike. The top and bottom yokes do a fine job of holding the fork stanchion in place without marking them. Like I said, I have since learned this and I held them in place like this instead

That's the fork wrapped with some cloth to protect it whilst it's held in place very lightly with a vice. I wouldn't recommend this and I've since bought a strap wrench so that if the yokes can't hold them in place the wrench can ... and it won't mark the surface.
Once the top bolt was undone a half turn I turned my attention to the bottom end of the forks. Inside the stanchion is a damper rod which is attached to the bottom of the fork leg. The stanchion is allowed to move along the length of the damper rod and it only held inside the fork leg by the end of the rod not fitting through the bottom of the stanchion (which tapers inwards).
So, to remove the stanchion you have to remove the damper rod. To remove that there's a 6mm hex bolt in the bottom of the fork that you need to undo. Trouble is, as soon as you start undoing it the fork damper starts turning with it. So you have to push something down into the fork stanchion to hold the top of the damper in place. The head of damper rod on the CB125 TD has no markings or grooves, it is perfectly symmetrical but it does taper internally so that the internal diameter gets smaller. This allows you to push a tapered wooden dowel (or equiv) inside and that holds it enough to turn the bolt out. Alternatively, you can try to use wizzy gun (compressed air wrench) which due to its high impact turns the bolt before the rod has chance to react. In fact, we had to do this with the 2nd fork (glad Andy bought that compressor!).
Here's the damper rod and fork leg once I'd undone the bolt and removed the stanchion from the leg.

Remember, the small rod was inside the stanchion and in the picture above is actually upside down. The 6mm hex bolt is shown re-attached to the damper rod in this picture. To remove the rod from the stanchion I had to fully undo the top nut on the stanchion, remove the spring and then let the rod fall out (along with lots of grubby oil).
The top nut isn't under a massive amount of pressure from the spring but be careful when undoing it. It caught me out first time and this was the result:

Ouch.

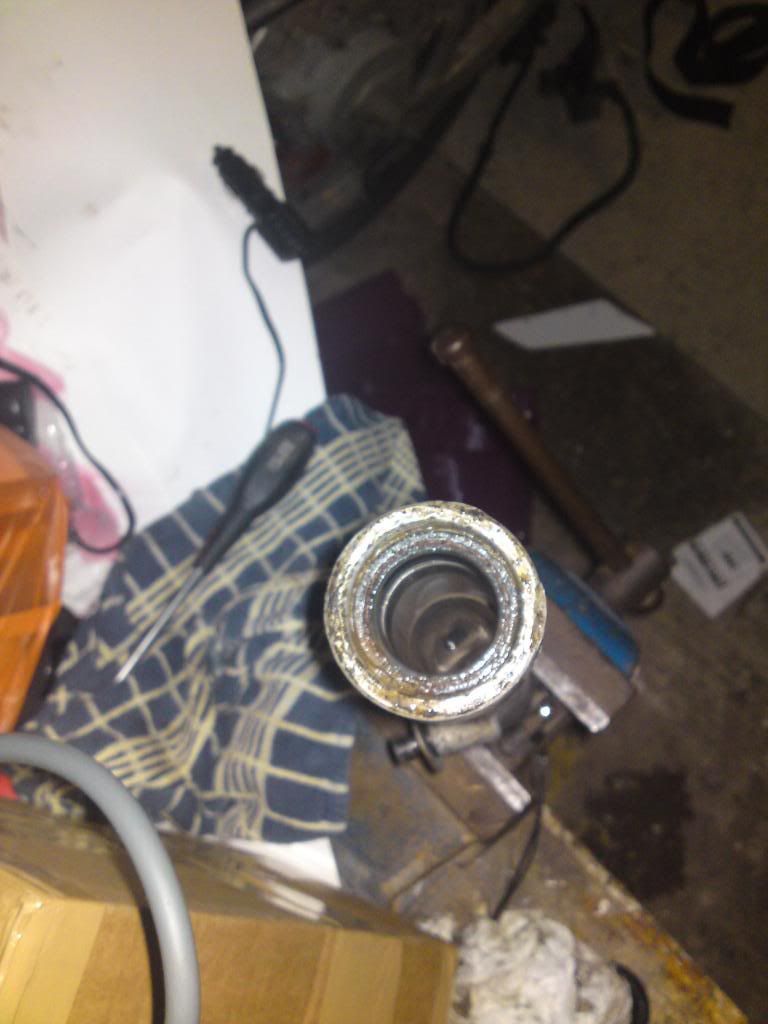
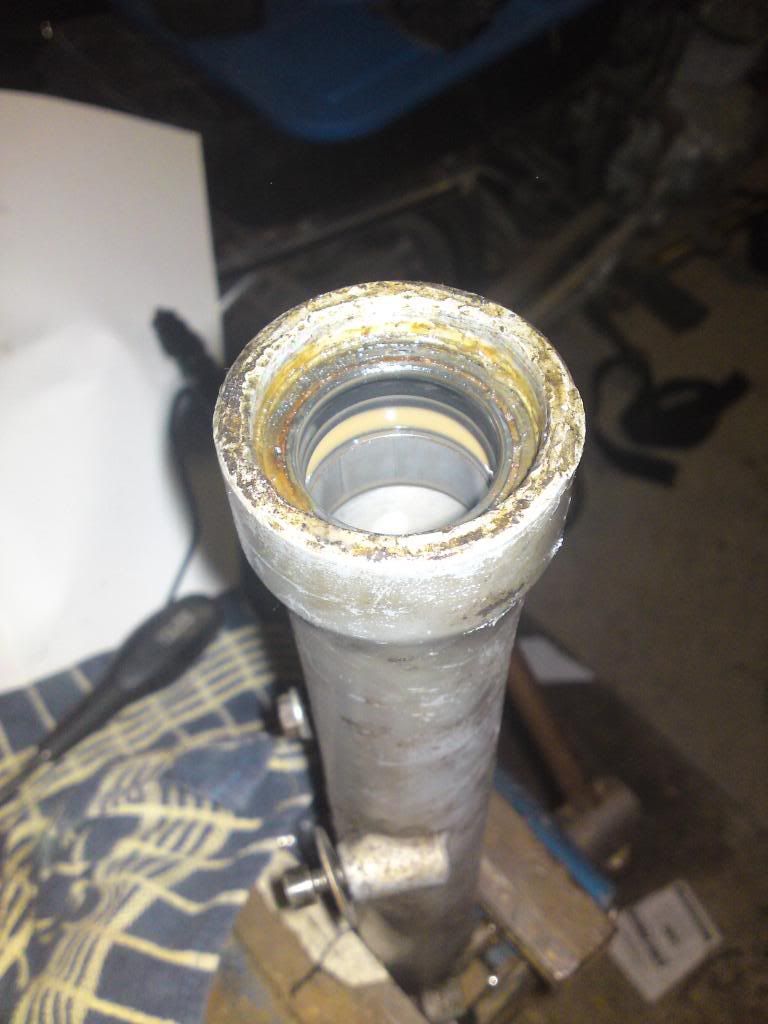
With the stanchions out of the way, I removed the dust seal with a small screwdriver and then spent the next 30 mins carefully removing the oil seal from the fork by prising it out with a larger screwdriver - all the time being careful not to damage the fork leg. Damn they are hard work to remove!
Just for reference, here's a couple of pics showing the internal view of the fork leg once the oil seals had been removed - next job is to prep them for paint..

First things first, stripping them down.
I've since learned that the first thing to do when attempting something like this is to crack the fork top nut before you remove them from the bike. The top and bottom yokes do a fine job of holding the fork stanchion in place without marking them. Like I said, I have since learned this and I held them in place like this instead
That's the fork wrapped with some cloth to protect it whilst it's held in place very lightly with a vice. I wouldn't recommend this and I've since bought a strap wrench so that if the yokes can't hold them in place the wrench can ... and it won't mark the surface.
Once the top bolt was undone a half turn I turned my attention to the bottom end of the forks. Inside the stanchion is a damper rod which is attached to the bottom of the fork leg. The stanchion is allowed to move along the length of the damper rod and it only held inside the fork leg by the end of the rod not fitting through the bottom of the stanchion (which tapers inwards).
So, to remove the stanchion you have to remove the damper rod. To remove that there's a 6mm hex bolt in the bottom of the fork that you need to undo. Trouble is, as soon as you start undoing it the fork damper starts turning with it. So you have to push something down into the fork stanchion to hold the top of the damper in place. The head of damper rod on the CB125 TD has no markings or grooves, it is perfectly symmetrical but it does taper internally so that the internal diameter gets smaller. This allows you to push a tapered wooden dowel (or equiv) inside and that holds it enough to turn the bolt out. Alternatively, you can try to use wizzy gun (compressed air wrench) which due to its high impact turns the bolt before the rod has chance to react. In fact, we had to do this with the 2nd fork (glad Andy bought that compressor!).
Here's the damper rod and fork leg once I'd undone the bolt and removed the stanchion from the leg.
Remember, the small rod was inside the stanchion and in the picture above is actually upside down. The 6mm hex bolt is shown re-attached to the damper rod in this picture. To remove the rod from the stanchion I had to fully undo the top nut on the stanchion, remove the spring and then let the rod fall out (along with lots of grubby oil).
The top nut isn't under a massive amount of pressure from the spring but be careful when undoing it. It caught me out first time and this was the result:
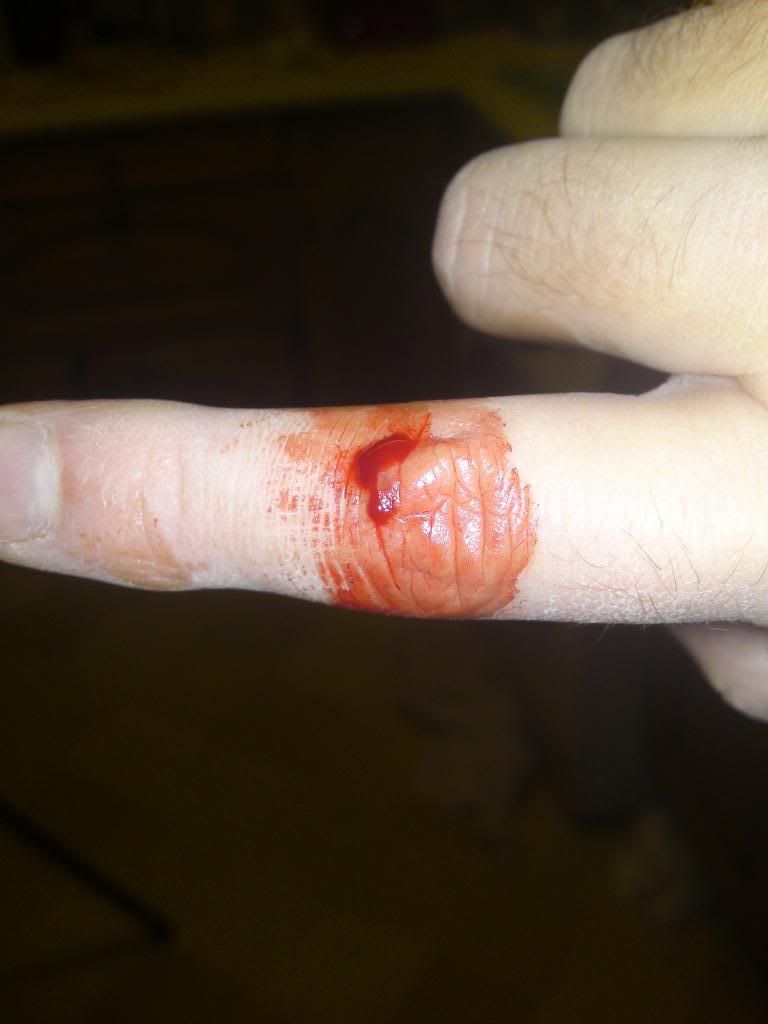
Ouch.
I completely drained the oil from the fork components and cleaned them up. You can see the internal spring and the state of the oil in this picture - it's a muddy water colour and doesn't look like oil to me
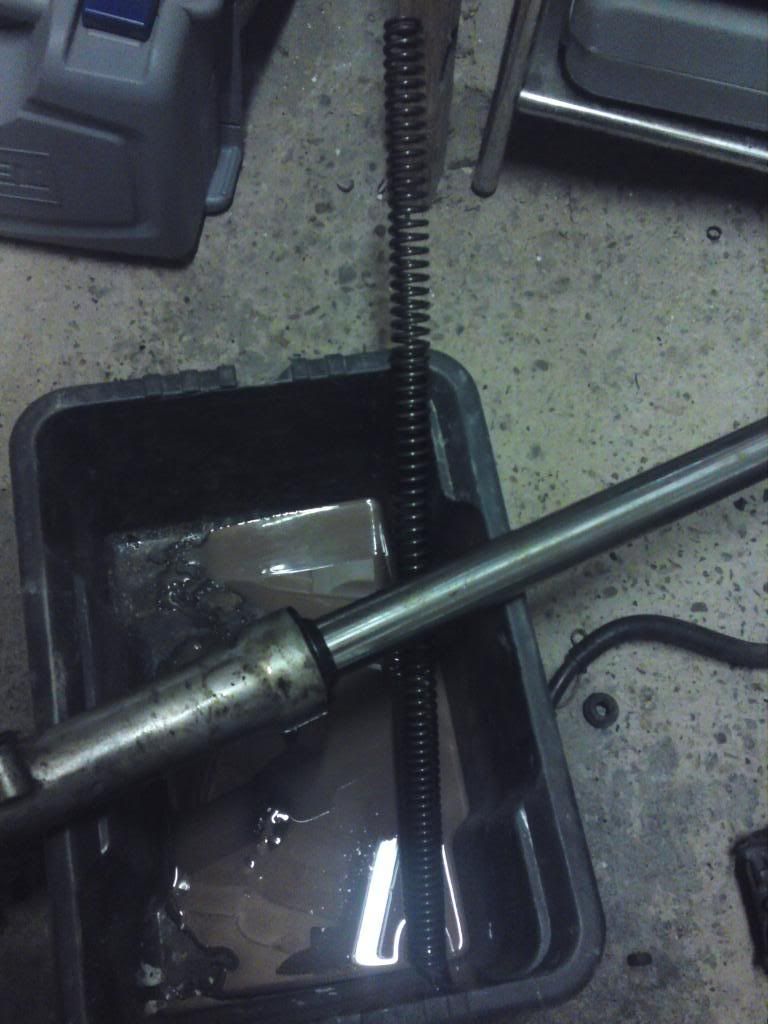
Just for reference, here's a couple of pics showing the internal view of the fork leg once the oil seals had been removed - next job is to prep them for paint..
Wednesday, 13 January 2010
Tidying up the Wiring Loom
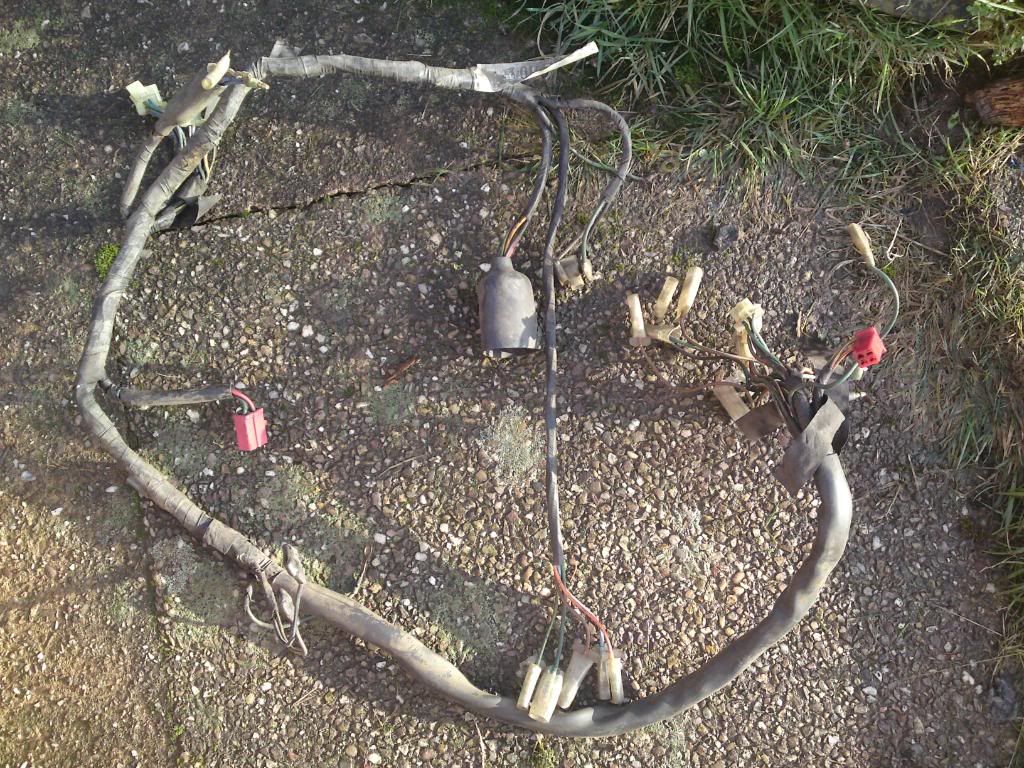
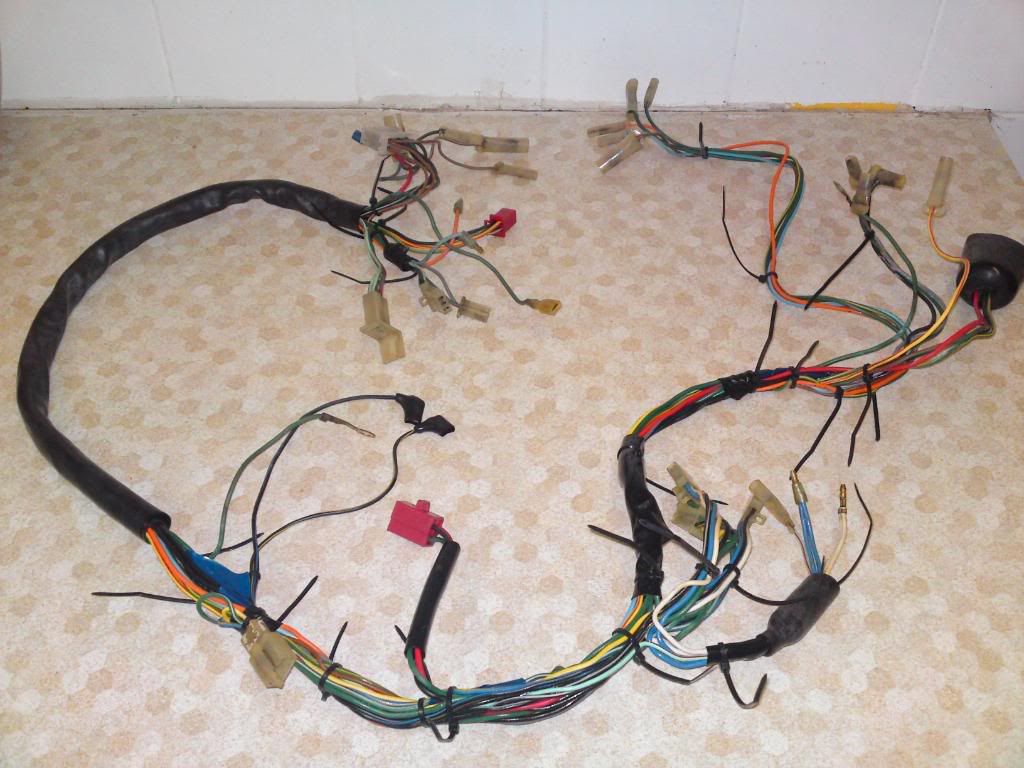
The wiring wasn't the worst part of our Superdream but not knowing the history of it I was a little weary of just connecting up a battery and seeing what happens.I decided to strip the loom so that I could check that there were no chaffed cables or connectors that may have been on their last legs.
First thing to do was remove any 'electronic' components from the loom such as diodes. Other major components such as the rectifier was still attached to the bike. I wouldn't recommend this process for such components! After this first step I was left with wire and connectors.
Next thing I did was to remove any electric tape from the loom. In the picture above you'll see that there's plastic and tape. I left the plastic in place because a) it's hard to remove and b) it's there for a reason.
Once I'd removed the tape I went around the loom and cable tied all the wires together that should be grouped together. I did this as I went along so that the wires didn't end up everywhere.
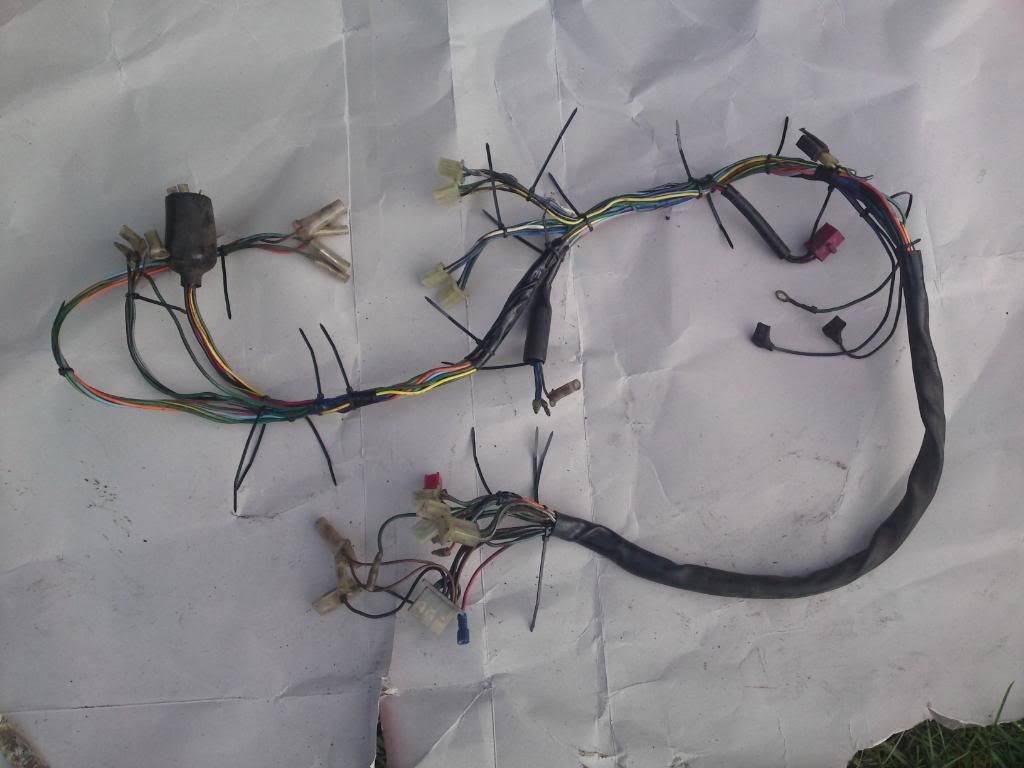
Removing the tape had left a sticky residue on the cables and if it wasn't removed it would have got dirty very quickly. Also some of the connectors (see the red connector at the top right of the picture that connects to the rectifier) were really covered in road crap, oil and dirt.
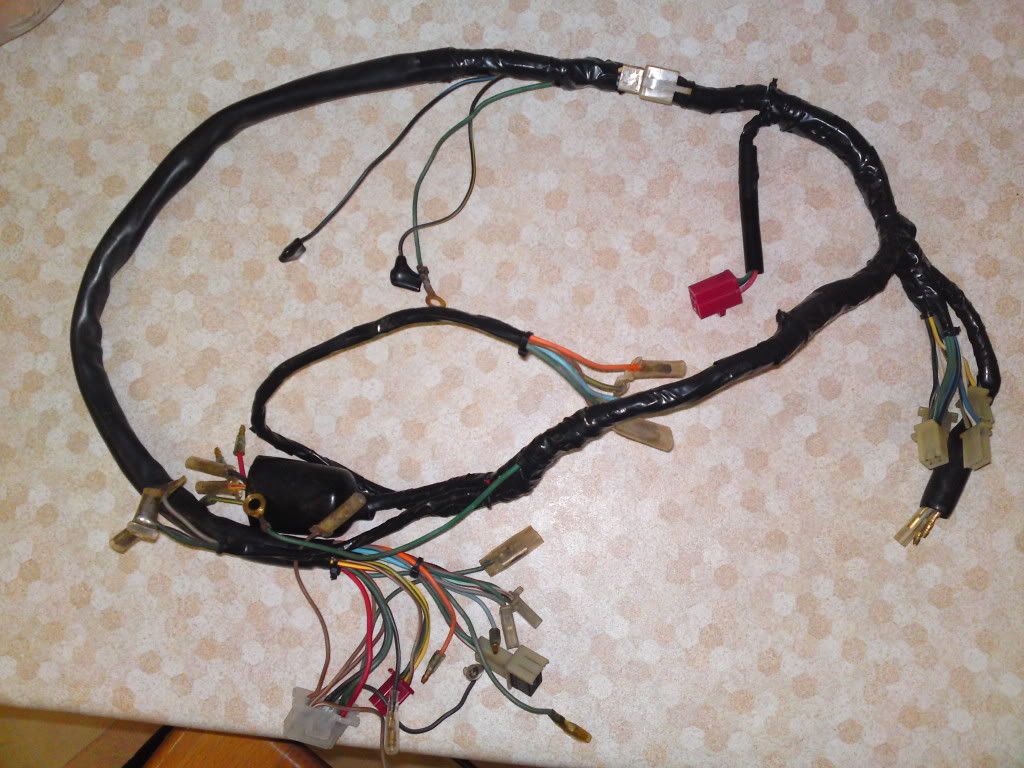
To remove all of these problems I dropped the loom into a bucket of hot water and paraffin
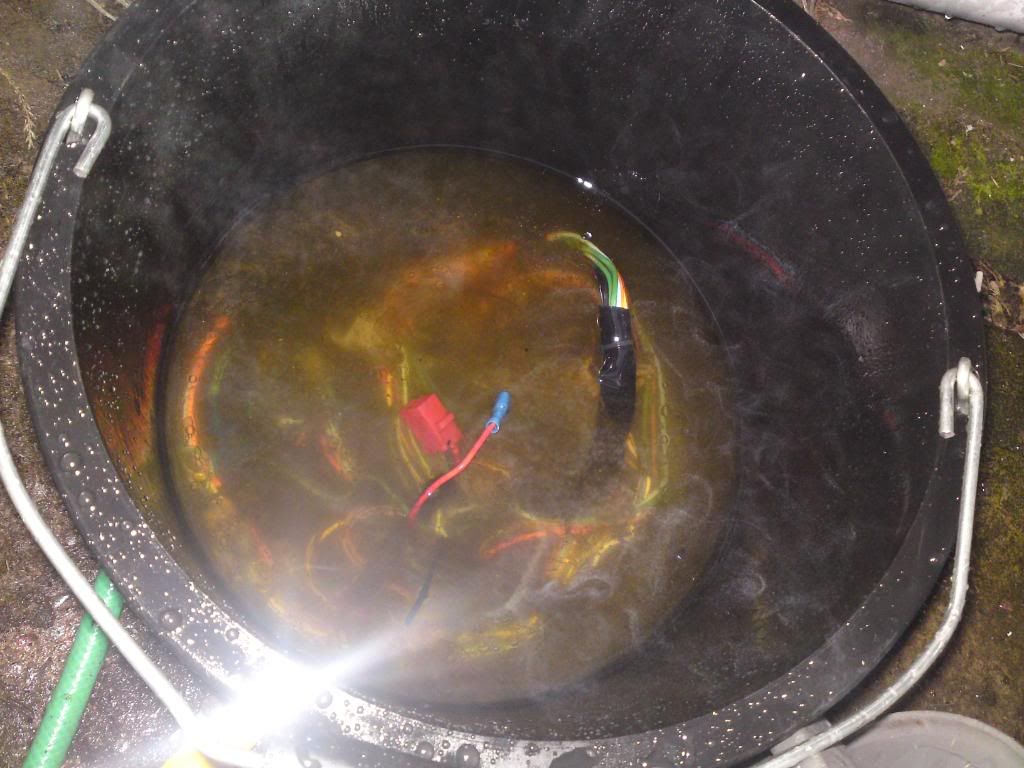
Pretty much straight away the water changed colour as the dirt and oil was dissolved by the paraffin. I gave it a stir with a trusty screwdriver and left it for half an hour. I came back and stirred it again. Left it another half an hour and rinsed the loom off. I then repeated this process and I ended up with the loom looking like this
Lastly, I made some repairs to damaged connectors, trimmed the cable ties and went over the loom with some new black electrical tape to protect the loom when it's back on the bike.
Just a small warning, be careful with paraffin it can be pretty nasty stuff.
Thursday, 7 January 2010
Removing rust using electrolysis
In my last post I mentioned that I had a plan for dealing with the rusty parts on the bike and that it would shock you. Please excuse my daft pun :)
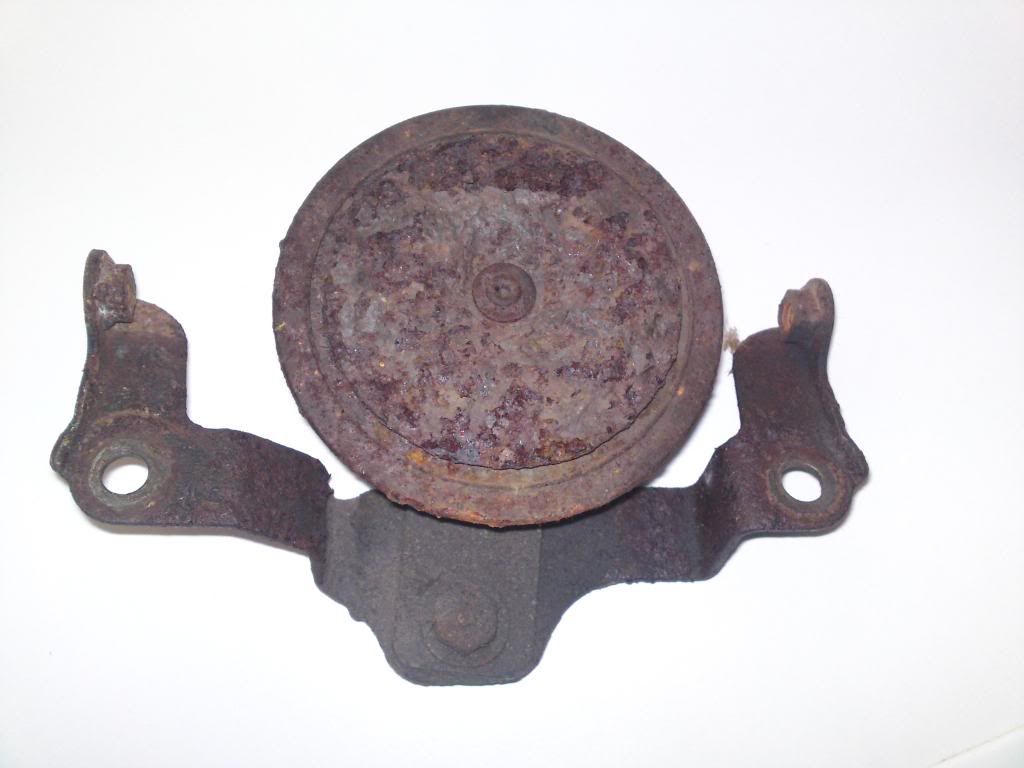
Here's a reminder of what the horn looked like:

Nasty and looks like it's ready for the bin. Well, not quite.
I came across a website that described how to remove rust by using electrolysis. I've linked this post to a good website that explains the scientific part of things so I won't go into the same detail again here. Take a look at that website to understand how and why this works.
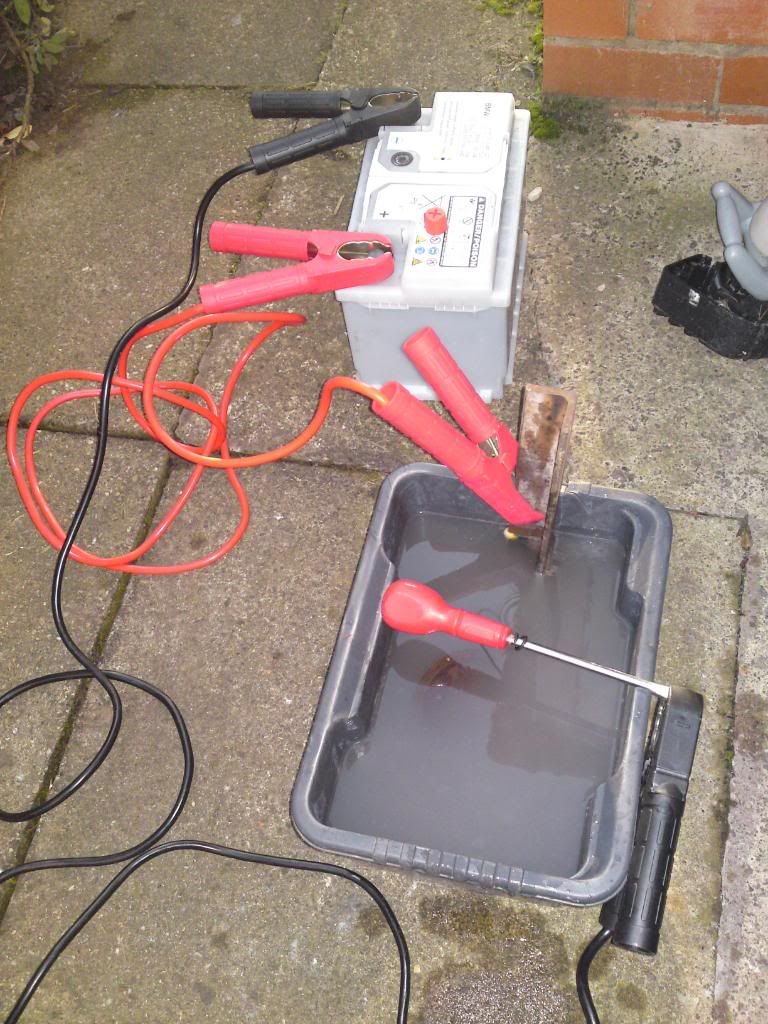
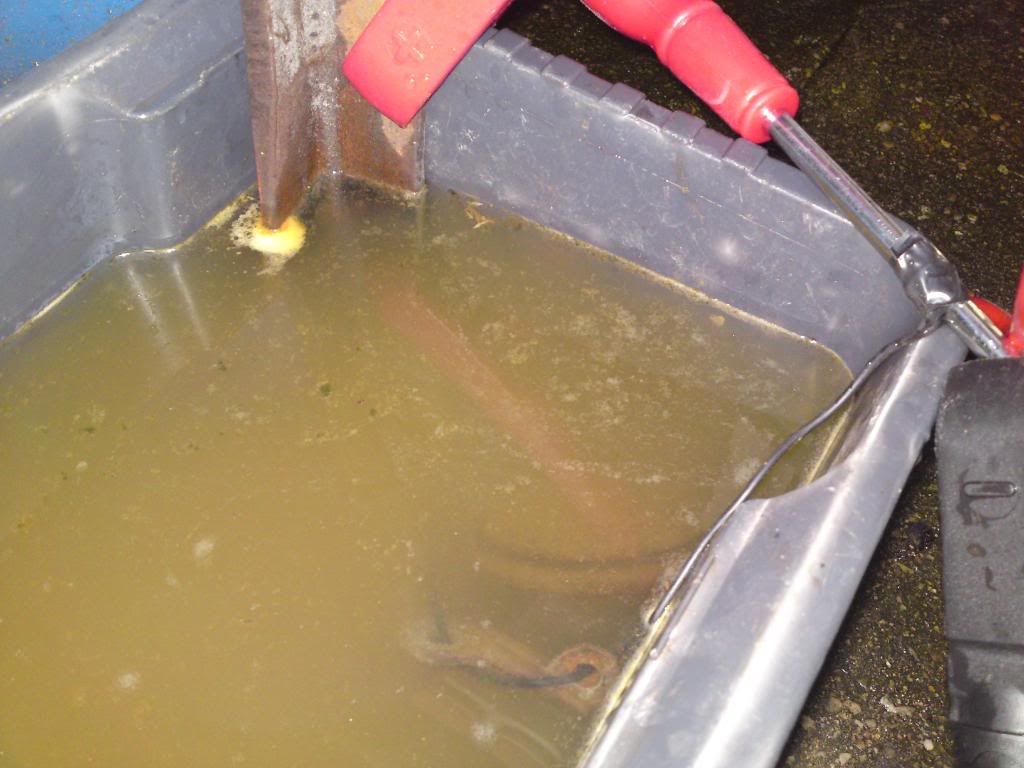
Here's the setup I made using a plastic tub, an old car battery, some jump leads, a sacrificial piece of steel and water with soda crystals dissolved in it.

What you might not be able to tell from that picture is that the negative lead is connected to a screwdriver and that connected to the screwdriver is a wire that's connected to the horn (the horn is suspended in the water by the wire).
I connected it all up and within a few seconds I could see small bubbles appearing on the surface of the water. Looking good! I left if for an hour and when I came back the water had changed colour and there was some residue next to the piece of steel connected to the positive wire (I'd moved the horn to the corner after the first picture):

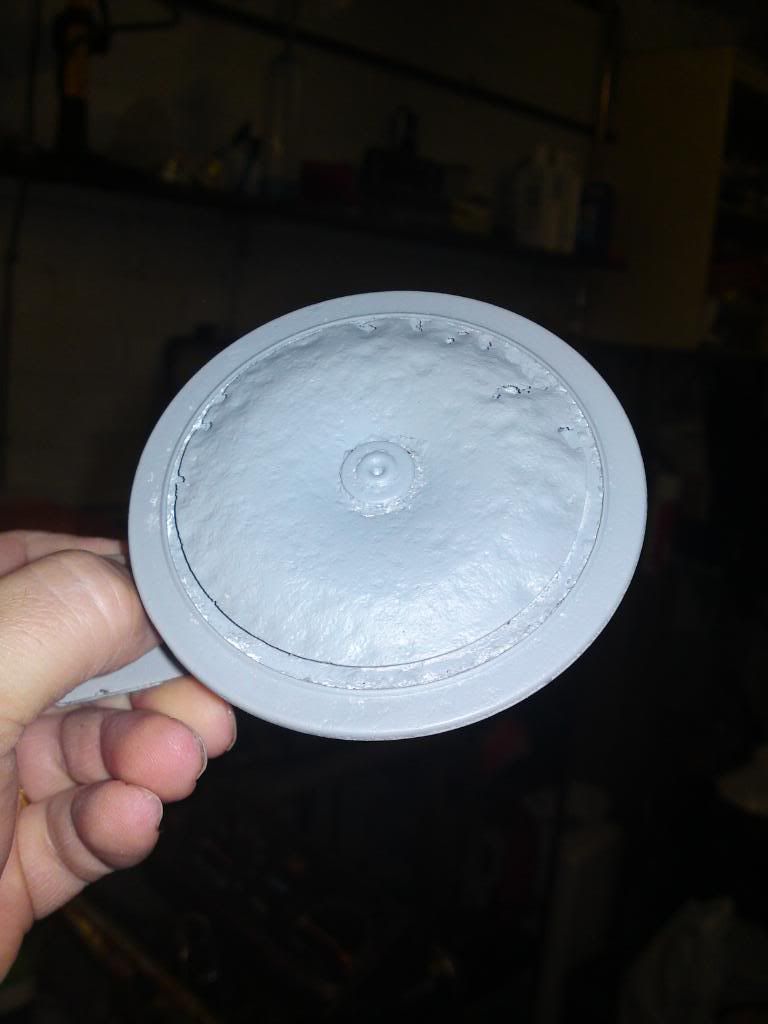
I'm not sure how long you're supposed to leave the pieces so I kept checking it was ok every hour or so. By the end of the day the water was really dirty and I figured it had done as much as it could be expected to. I took the horn out, gave it a good clean and scrub with a wire brush and then primed it to prevent any new rust from taking hold.
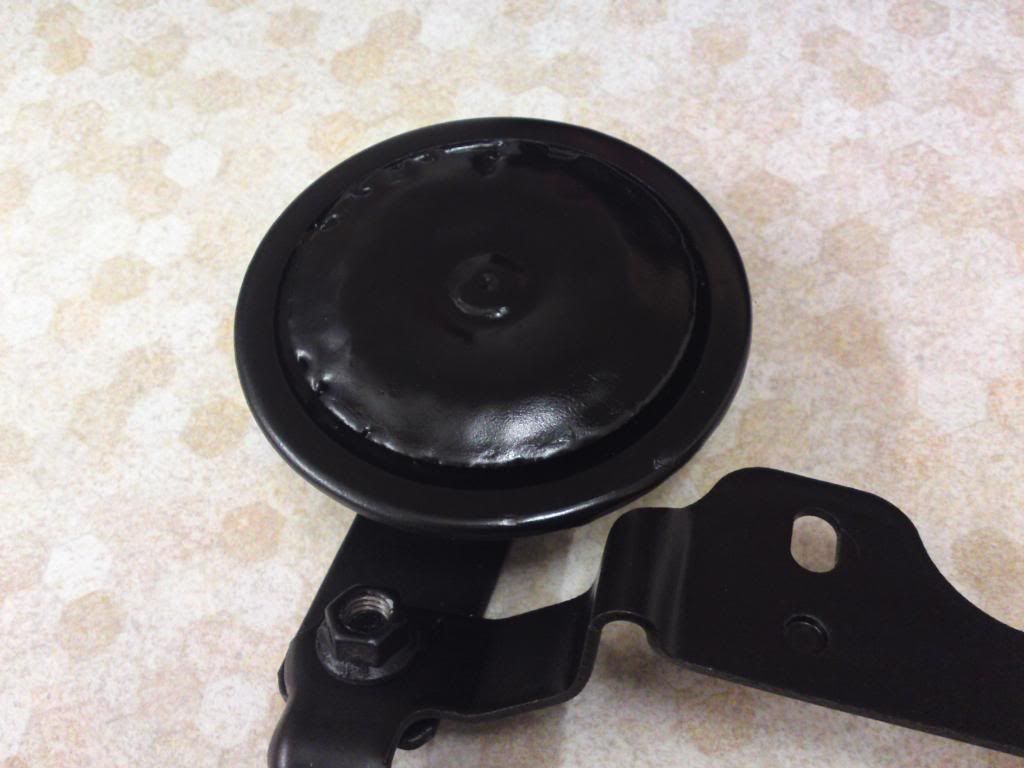
Some of the metal had been completely eaten by the rust so the restoration process couldn't get that back but the remainder of the horn came out really well when you consider how bad it was. Here it is in primer grey and then painted with some hammerite smooth paint. It just needs another coat to finish it off.


Oh and when I connected it up to the battery it worked fine and was pretty damn loud! Result :)
Here's a reminder of what the horn looked like:
Nasty and looks like it's ready for the bin. Well, not quite.
I came across a website that described how to remove rust by using electrolysis. I've linked this post to a good website that explains the scientific part of things so I won't go into the same detail again here. Take a look at that website to understand how and why this works.
Here's the setup I made using a plastic tub, an old car battery, some jump leads, a sacrificial piece of steel and water with soda crystals dissolved in it.
What you might not be able to tell from that picture is that the negative lead is connected to a screwdriver and that connected to the screwdriver is a wire that's connected to the horn (the horn is suspended in the water by the wire).
I connected it all up and within a few seconds I could see small bubbles appearing on the surface of the water. Looking good! I left if for an hour and when I came back the water had changed colour and there was some residue next to the piece of steel connected to the positive wire (I'd moved the horn to the corner after the first picture):
I'm not sure how long you're supposed to leave the pieces so I kept checking it was ok every hour or so. By the end of the day the water was really dirty and I figured it had done as much as it could be expected to. I took the horn out, gave it a good clean and scrub with a wire brush and then primed it to prevent any new rust from taking hold.
Some of the metal had been completely eaten by the rust so the restoration process couldn't get that back but the remainder of the horn came out really well when you consider how bad it was. Here it is in primer grey and then painted with some hammerite smooth paint. It just needs another coat to finish it off.
Oh and when I connected it up to the battery it worked fine and was pretty damn loud! Result :)
Tuesday, 5 January 2010
Fe2O3
... or Rust to you and me.
It's everywhere on the bikes we've bought! The exhausts are holed and not worth repairing. One of the bolts in the bottom yoke just broke when I tried to undo it. The stuff is everywhere.
Here's an example of how bad some of the corrosion is:

That's what's left of the horn. Has this bike been used as a ships' anchor or something?!
Or how about this:

I have a plan on how to deal with this rust problem and it may shock you! So watch this space.
Subscribe to:
Comments (Atom)